Recreating The DVD Screensaver In SwiftUI
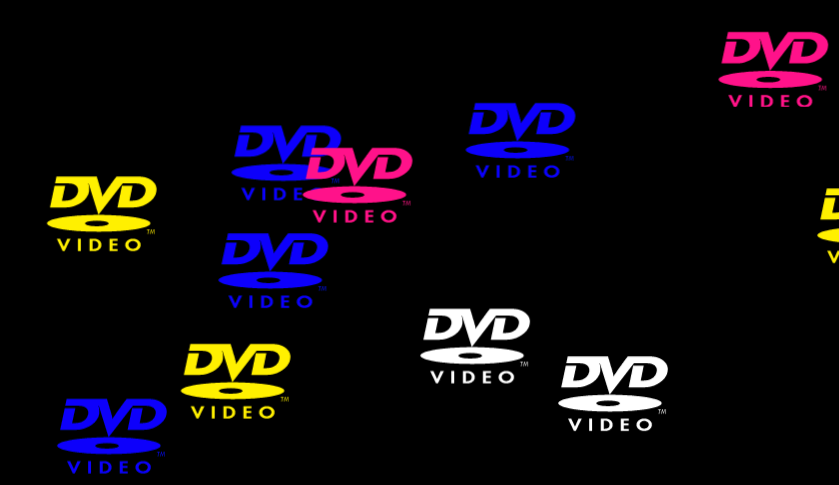
Do you remember that DVD screensaver from the early 2000s? Not only was it a practical tool for preventing screen burn-in on CRT displays, but it's also become a cultural icon.
Like many of you, I can remember seeing this screensaver as a kid, but I'd completely forgotten about it until I rewatched this scene from "The Office" recently:
I thought it'd be fun to recreate this screensaver using SwiftUI. Admittedly, there's no real reason for it other than the fact that I've got a long flight ahead and some time to kill.
Let's get started!
Working With The Canvas API
First things first, let's get all the UI elements set up. We can tackle the animation later.
struct ContentView: View {
@State private var position: CGPoint = .zero
private let canvasSize: CGSize = UIScreen.main.bounds.size
private let imageSize: CGSize = CGSize(width: 128, height: 76)
private let image = Image("dvd_logo")
var body: some View {
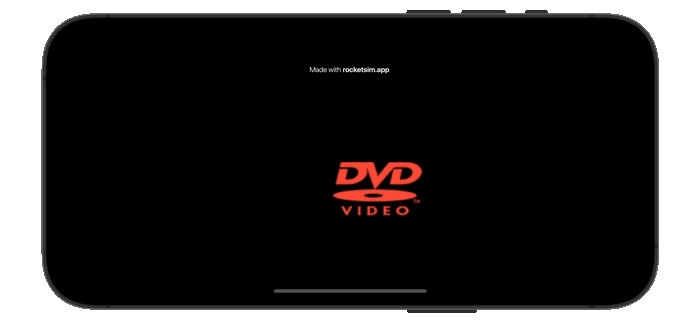
Canvas { [position] context, size in
// Set the background color to .black
context.fill(Path(CGRect(origin: .zero, size: size)), with: .color(.black))
// Draw image at current position
var image = context.resolve(image)
image.shading = .color(.red)
context.draw(
image,
in: CGRect(x: position.x, y: position.y, width: imageSize.width, height: imageSize.height)
)
}
.onAppear {
// Set initial position to the center of the canvas after the view appears
position = CGPoint(x: (canvasSize.width - imageSize.width) / 2, y: (canvasSize.height - imageSize.height) / 2)
}
.ignoresSafeArea()
}
}We're able to use SwiftUI's Canvas API to set a background color for the screen and draw an image with a background color applied. Then, in the onAppear, we're calculating the center point of the screen and using that as the starting location for the image.
Aside: The Need For The Capture Group
At this point, I encountered some interesting behavior with the Canvas API.
Unless I explicitly declared position in the Canvas's capture group, the image would always get drawn at .zero even though the position is updated in the onAppear.
This behavior becomes even more interesting when you compare it to a regular SwiftUI view with a similar setup, where everything behaves as expected.
In the following SwiftUI view, the Text element accurately reflects the center of the View, and the View gets redrawn when the position value changes in .onAppear.
struct ContentView: View {
    @State private var position: CGPoint = .zero
    private let canvasSize: CGSize = UIScreen.main.bounds.size

    var body: some View {
        VStack {
            Text("\(position.x), \(position.y)")
        }
        .onAppear {
            // Set initial position to the center of the view after it appears
            position = CGPoint(x: canvasSize.width / 2, y: canvasSize.height / 2)
        }
    }
}
Let's chalk this up to a difference in how Canvas manages it's dependencies and continue on with our implementation. If you know what's going on here, I'd love to hear about it.
Creating A Draw Loop
So far, we've successfully replicated the appearance of the DVD screensaver.
Next, we'll need to build a mechanism to trigger the View to redraw at regular intervals. My initial approach was to simply use a Timer that fired every 1/30th of a second, so the View would redraw at 30 frames per second.
After some feedback from users on Reddit about this original approach, it turns out that using CADisplayLink is a far better option.
CADisplayLink is a timer object that allows your app to synchronize its drawing to the refresh rate of the display. Using CADisplayLink ensures that our UI updates appear smooth and free the visual artifacts that might occur if our updates are out of sync with the screen's refresh rate.
The following CADisplayLink wrapper below allows us to detect when the hardware intends to redraw the screen and trigger a custom completion handler at that time.
@MainActor
final class DisplayLink {
    private var displaylink: CADisplayLink?
    private var update: (() -> Void)?

    func start(update: @escaping () -> Void) {
        self.update = update

        displaylink = CADisplayLink(
            target: self,
            selector: #selector(frame)
        )
        displaylink?.add(to: .current, forMode: .default)
    }

    func stop() {
        // Stops the display link from firing and effectively
        // invalidates it, removing it from all run loop modes.
        //
        // After calling .invalidate(), the display link
        // cannot be reused.
        displaylink?.invalidate()
        update = nil
    }

    @objc func frame() {
        update?()
    }
}
Then, in our View, we can simply add:
@State private var displayLink = DisplayLink()
....
.onAppear {
    displayLink.start {
    // Update position of the image
    }
}
.onDisappear {
    displayLink.stop()
}
Now, we know we want the image to move every time the View is redrawn, but how fast should it move?
Let's add a velocity vector to control the movement speed of the DVD logo:
@State private var velocity: CGVector = CGVector(dx: 1, dy: 1)In the displayLink update block, we'll update the position.x and position.y by adding the corresponding values from the velocity vector. This adjustment allows us to control the speed of movement along the X and Y axis independently.
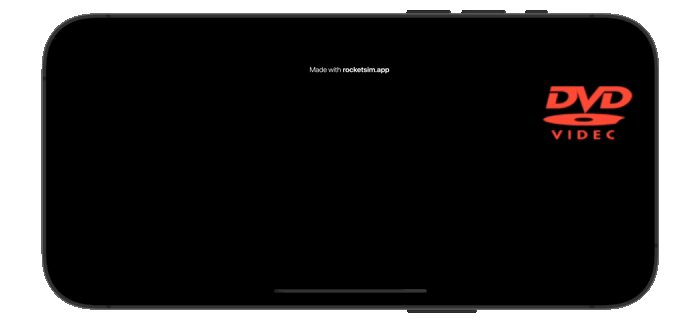
displayLink.start {
    // Update position based on velocity
    position.x += velocity.dx
    position.y += velocity.dy
}
If you were to run this now, you'd notice the image gradually drifting off-screen:
Next, we'll add some boundary checks to ensure our image stays within the visible area of the screen.
Adding Boundary Checks
How should we respond when our image reaches an edge?
If the image is approaching the right side of the screen, then all we need to do is switch the direction of its horizontal movement, right? Similarly, if the image is approaching the top of the screen, we only need to flip its vertical movement while keeping its horizontal movement the same.
With this intuition in place, the boundary checks become very simple:
displayLink.start {
    // Update position based on velocity
    position.x += velocity.dx
    position.y += velocity.dy

    // Check if image hits an edge
    if position.x + imageSize.width >= canvasSize.width || position.x <= 0  {
        // Flip horizontal direction
        velocity.dx *= -1
    }

    if position.y + imageSize.height >= canvasSize.height || position.y <= 0 {
        // Flip vertical direction
        velocity.dy *= -1
    }
}
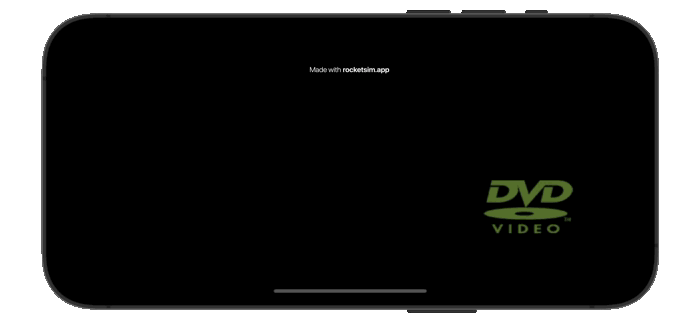
We're on the home stretch now! Now, all we need to do is change the color of the image every time it hits an edge.
@State private var imageColor: Color = .green

// In Canvas
var image = context.resolve(image)
image.shading = .color(imageColor)

// In displayLink.start {..}
// Check if image hits a horizontal edge
if position.x + imageSize.width >= canvasSize.width || position.x <= 0  {
    // Flip horizontal direction
    velocity.dx *= -1
    imageColor = Color.random()
}

if position.y + imageSize.height >= canvasSize.height || position.y <= 0 {
    // Flip vertical direction
    velocity.dy *= -1
    imageColor = Color.random()
}

extension Color {
    static func random() -> Color {
        let red = Double.random(in: 0...1)
        let green = Double.random(in: 0...1)
        let blue = Double.random(in: 0...1)
        return Color(red: red, green: green, blue: blue)
    }
}
You can find the source code here:
 aryamansharda
Hope you enjoyed this article! If you did, please consider sharing 😊🙏.
If you're interested in more articles about iOS Development & Swift, check out my YouTube channel or follow me on Twitter.
And, if you're an indie iOS developer, make sure to check out my newsletter! Each issue features a new indie developer, so feel free to submit your iOS apps.
 Indie Watch