Do you know what .layoutIfNeeded() actually does?
You’re more of a video kind of person? I’ve got you covered! Here’s a video with the same content than this article 🍿
If you’ve worked on a UIKit project, there’s a good chance that you came across calls to a method called .layoutIfNeeded().

And you might actually not have been sure what these calls did and when it made sense to use that method.
So let’s have a look at an example to try and understand how it works!
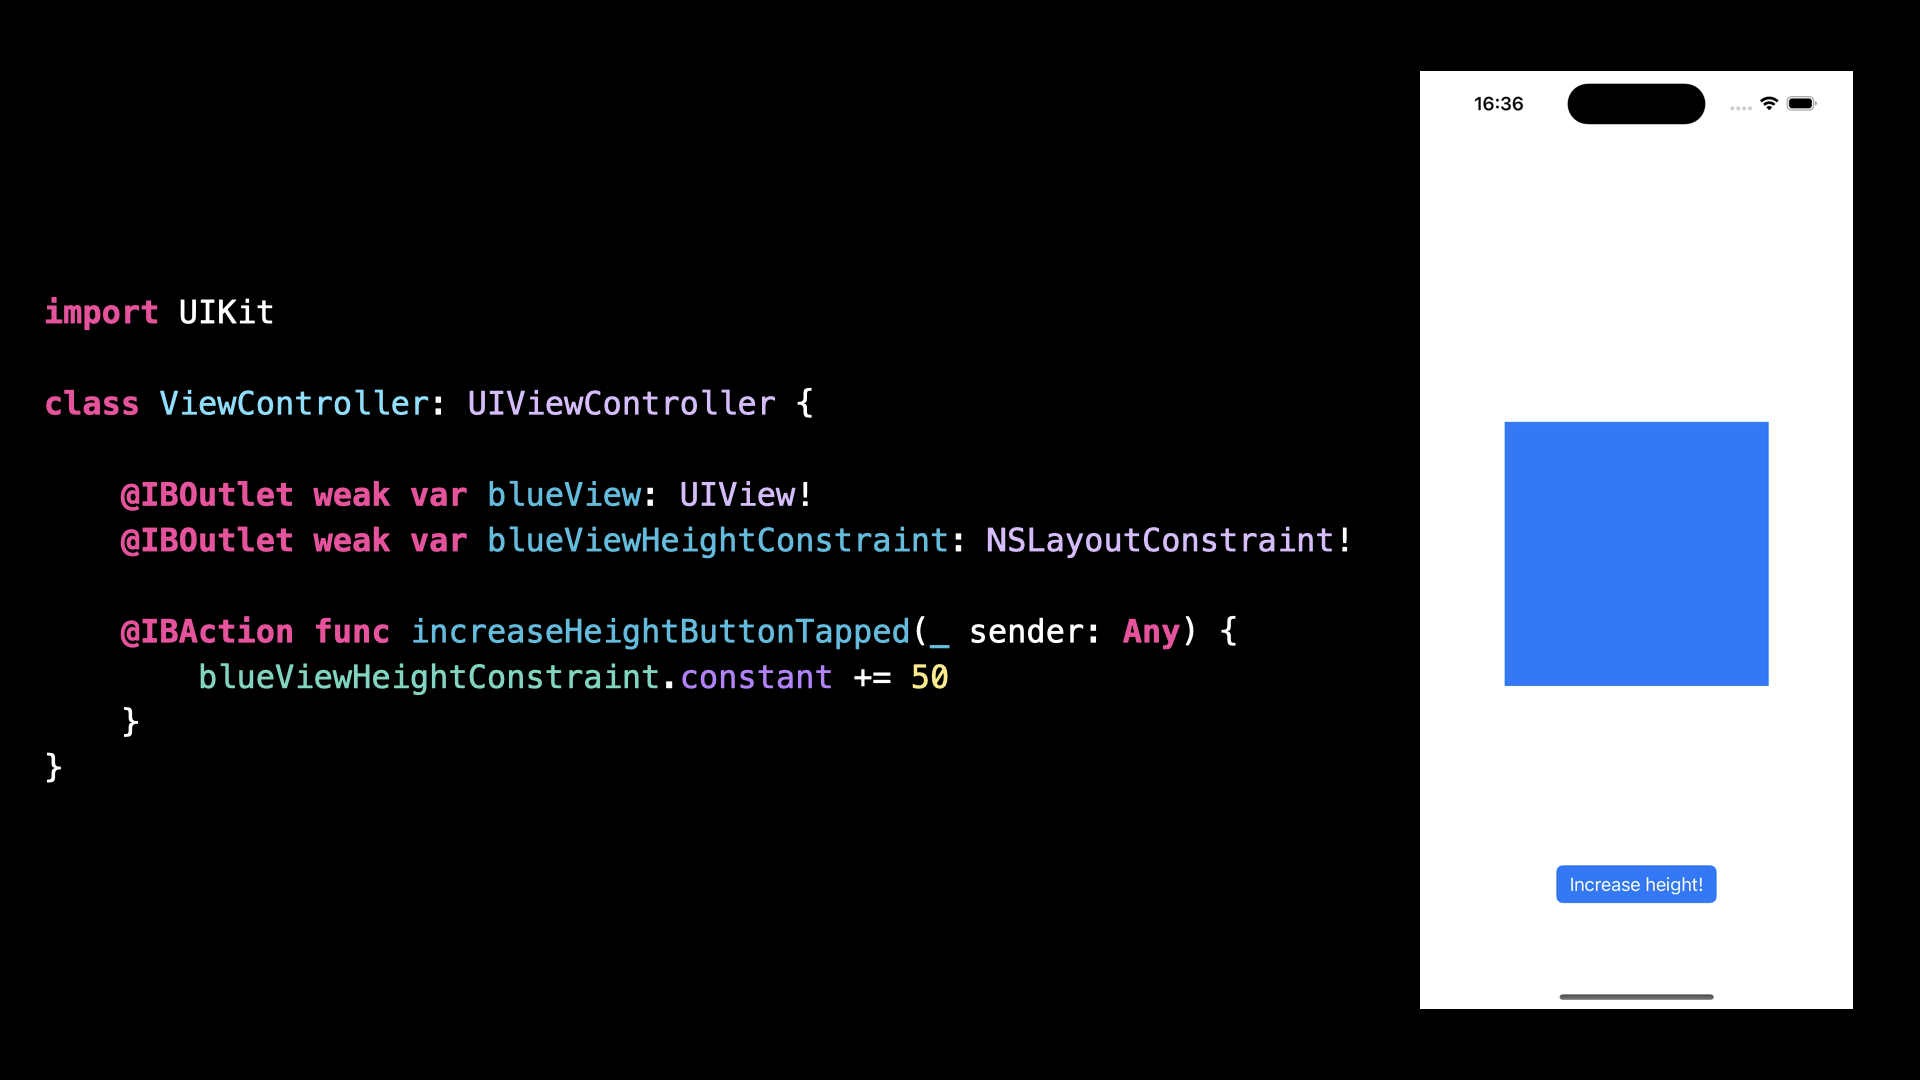
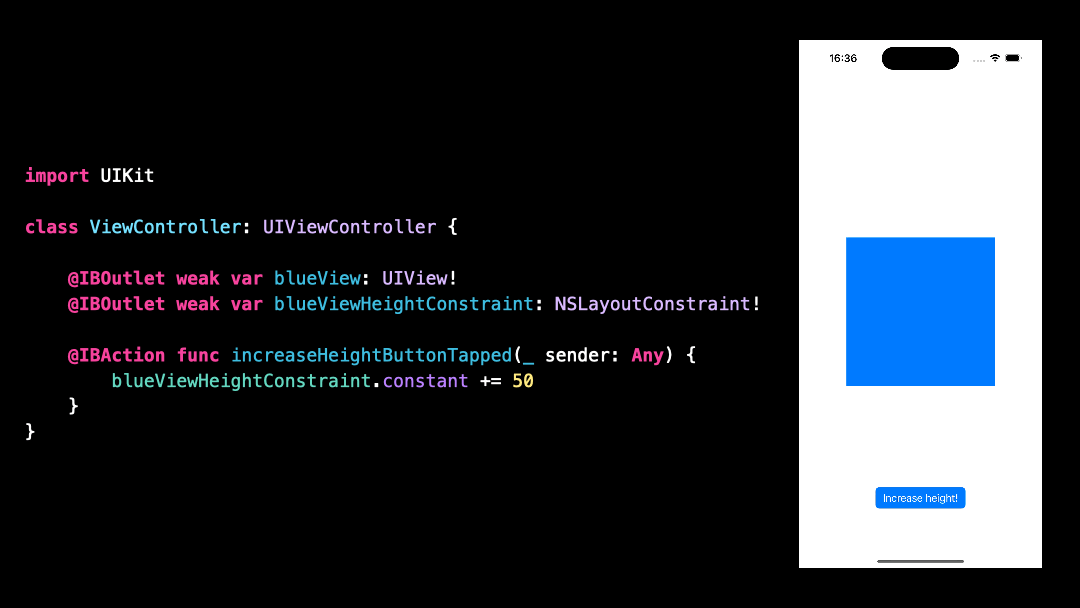
Here we have a simple ViewController, which displays a blue-colored subview, along with a button to increase the height of that blueView.
When the user taps the button, we can see that indeed the height of the blueView increases, and that we didn’t need to call the method .layoutIfNeeded() for it to happen.
But let’s look a bit closer!
I’m going to print the height of the blueView before and after we update the constraint.

As you can see, after we’ve updated the constraint the height of the blueView hasn’t changed!

This is a bit unsettling, because we did see that the height of the blueView had increased.
The explanation is that our code doesn’t directly update the frame of the blueView.
It updates the height constraint of the blueView, which in turn will update its frame, when the views are laid out again.
This layout process will happen automatically, after that the tap event on the button has been processed.
And that’s why we don’t see the height of the blueView being immediately updated!
In most cases, this approach is smart, because waiting for the user interaction to be processed before laying out the views minimizes the number of time that the layout process has to happen.
So it makes sense that this is the default behavior!
However, it might happen that the rest of your code does need to have the geometry of the views updated in order to run correctly.
In that case, you can manually trigger the layout process by calling the method .layoutIfNeeded() on the parent view.

And as you can see, after calling the method .layoutIfNeeded(), the height of the blueView has indeed been updated.

A great example of when the method .layoutIfNeeded() is very useful is when implementing animations.
If I remove the call to the method .layoutIfNeeded() and wrap my code into an animation closure…

…we can see that even though the code is wrapped in an animation closure, no animation is happening on the screen.
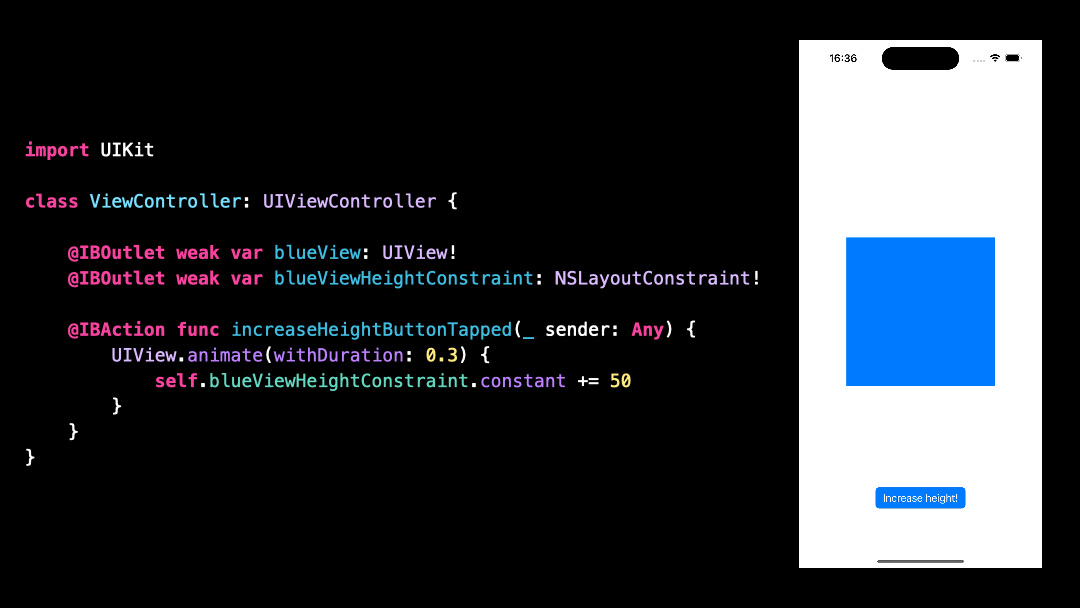
This can be surprising the first time you have to deal with this situation, but we can use what we’ve learned to explain it!
An animation closure will animate any change made to an animatable property that happens inside the closure.
However, we’ve seen that even though we update the constraint within the closure, the frame of the view will be updated later, after the closure has returned.
So that’s why the change in height isn’t animated!
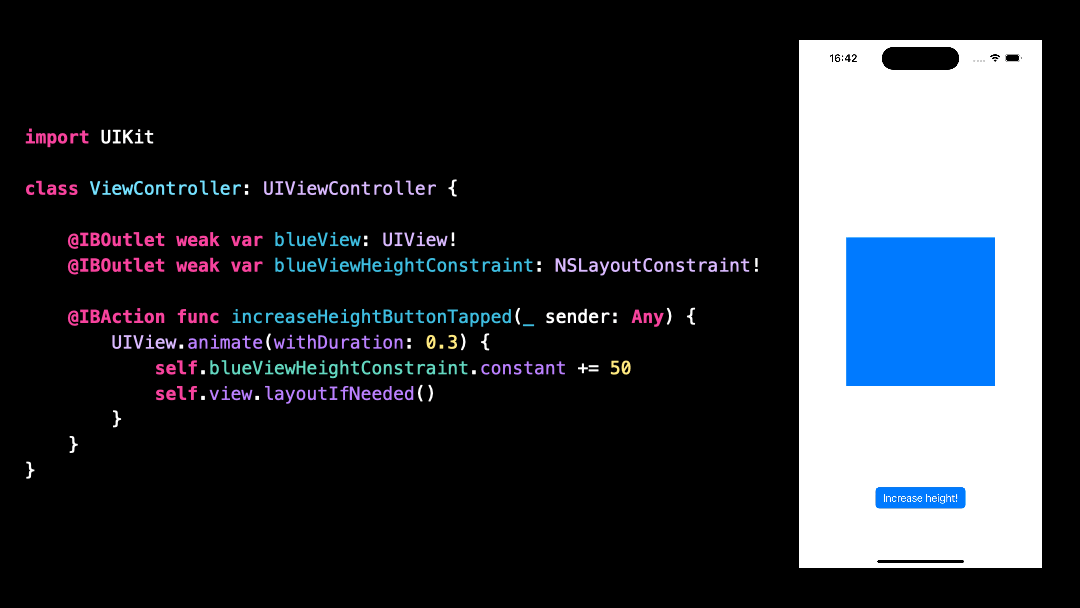
To solve this issue, we need to have the update of the view’s frame happen inside the animation closure, and we know how to do it: by calling the method .layoutIfNeeded()

And now we can see that the animation is indeed happening as expected!
So that’s it, now you know what the method .layoutIfNeeded() does and when it makes sense to call it!
That’s all for this article, I hope you’ve enjoyed it!
Here’s the code if you want to experiment with it:
// First Example
import UIKit

class ViewController: UIViewController {

    @IBOutlet weak var blueView: UIView!
    @IBOutlet weak var blueViewHeightConstraint: NSLayoutConstraint!

    @IBAction func increaseHeightButtonTapped(_ sender: Any) {
        print(blueView.frame.height) // 240
        blueViewHeightConstraint.constant += 50
        print(blueView.frame.height) // 240
        view.layoutIfNeeded()
        print(blueView.frame.height) // 290
    }
}

// Second Example
import UIKit

class ViewController: UIViewController {

    @IBOutlet weak var blueView: UIView!
    @IBOutlet weak var blueViewHeightConstraint: NSLayoutConstraint!

    @IBAction func increaseHeightButtonTapped(_ sender: Any) {
        UIView.animate(withDuration: 0.3) {
            self.blueViewHeightConstraint.constant += 50
            self.view.layoutIfNeeded()
        }
    }
}